How to migrate your data from Intercom
Learn how to smoothly import your Intercom data to User.com
To make the data migration process as easy as possible we’ve prepared a dedicated Intercom importer.
If, however, you have any problems with using the importer or for any reasons you prefer to make the migration manually – don’t worry! You’ll find the detailed step-by-step guides below.
Also, to make your transition as effortless as possible, we’ve come up with an Intercom-User.com dictionary – read this article to get an overview about how naming differs between the two apps.
I. Migrating data with Intercom importer
Important notes
Please note that this option may be blocked/changed since it is third-party integration - it's not only depending on User.com. If you have any problems with importing, please contact our Customer Support via chat.
Also, please note that with Intercom importer we are mapping into users' "user_id" User.com attribute values from Intercom system ID, not your custom "user id"
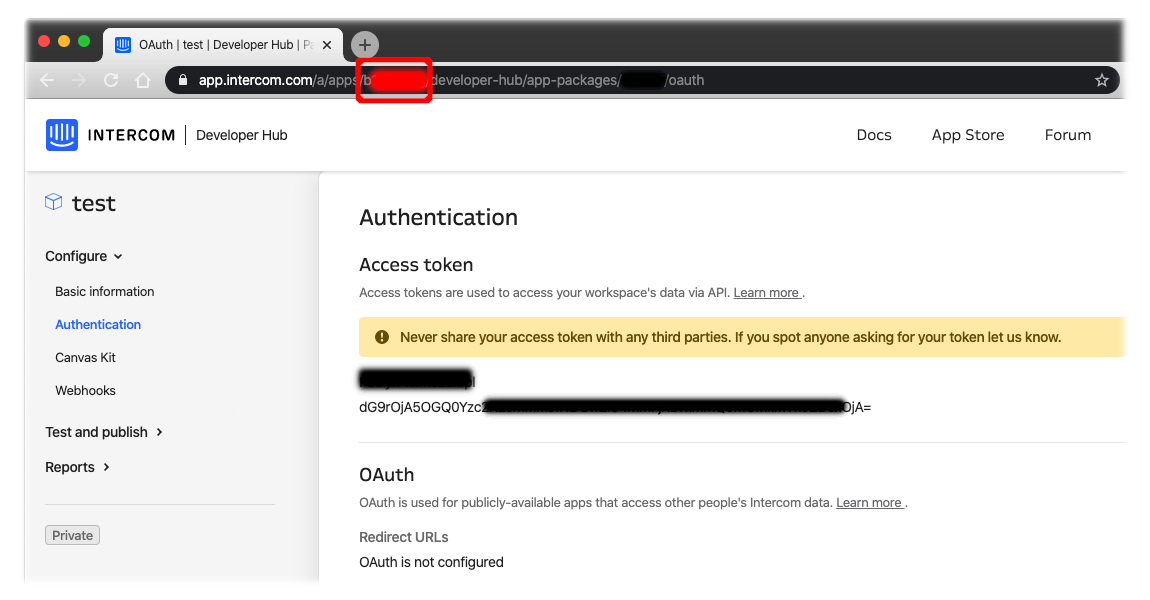
Step 1: Getting the Intercom Access Token
If you want to export a full list of the contacts from your Intercom account, you need an Access Token. You can get it by following these instructions.
You will also need the App ID - you can be find it in the URL link, as shown below:
Step 2: Import
Once you have the Access Token and App ID, go to Settings -> Importers -> Intercom.
This is where you have to enter the Intercom Access Token and your Intercom App ID. Once you click Save Changes and Import data, User.com will begin downloading contacts from Intercom. You will see then a panel with the number of tasks started and finished. Bear in mind that Intercom limits the number of API calls to 500 per minute - if your contact base is larger than one thousand users, it might take a while before all contacts are in place.
What data can I import by the importer?
- User data and attributes
- Lead data and attributes
- User notes
- Company data and attributes
- Conversations
Additional information about custom attributes:
In User.com app while importing data from Intercom with custom attributes, we:
1. Look for the attribute with the EXACT SAME name, and if we find it we will update it. If not...
2. Look for the attribute with the same STANDARD name, for example. SuPER-AttributE will be change to super_attribute, and if we find it, we update it.
3. If those methods do not work, we create such custom attribute with the value type STRING.
II. Migrating data manually
An alternative way to import data from Intercom is to do it by generating .csv files in your Intercom app and uploading them to User.com.
What can you import from Intercom manually?
- User data and attributes
- Lead data and attributes
- Company data and attributes
Step 1: Exporting data from Intercom manually
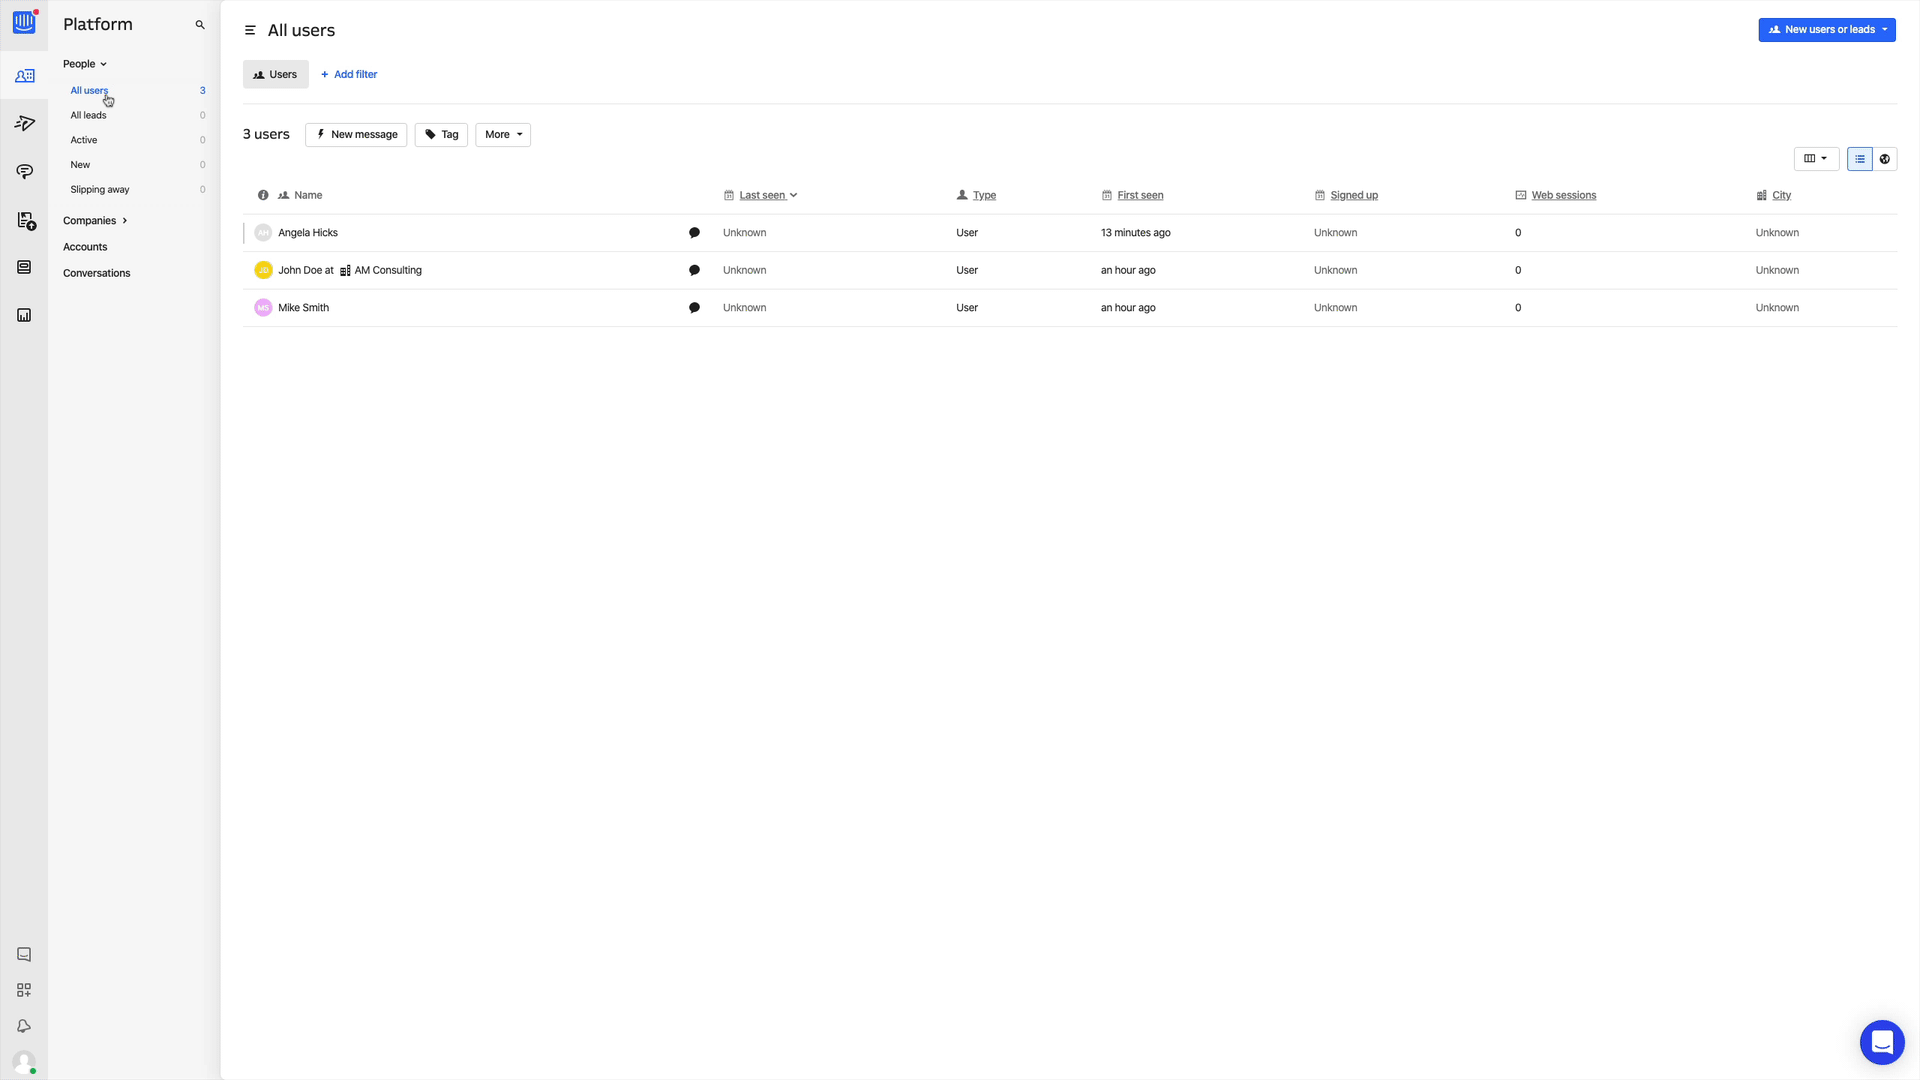
To do that , first in your Intercom app go to the section you want the data to export from (“All users”, “All leads” or “Companies -> All”), click "More" and confirm export intent.
Step 2: Importing data to User.com manually
Then, in User.com go to Settings -> Importers and select the type of data you want to import. Remember that if you export “All leads” from intercom, you should import them to User.com by using “Import Users” option. To learn more about the differences in nomenclature between Intercom and User.com, have a look at this article.